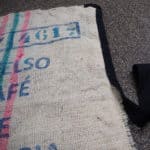
A little while ago I bought a whole load of old coffee bean sacks… And got the Best Free Cup of Coffee Ever. I have lots of ideas for the old sacks and precious little time! But I did do something with one of the sacks. I made a Coffee Bean Sack Rug. It looks great and was fairly straightforward.
Top Tips – Coffee Bean Sack Rug
The coffee bean sacks are usually made of jute which is hard wearing. Great for rugs. However the will have been holding some quite heavy coffee beans so you will want to make sure the weave is intact and there is no fraying.
You will probably want to wash (or somehow clean) the sacks before use. Be careful if your sacks are printed as this may run or come out in the wash.
How much binding you will need is dependent upon the size of your sack. My sack when opened out, and laid flat, was approximately 1.8 metres by 0.75 metres. This meant that I needed 5.1 metres plus a small overlap/ allowance of 0.1 metres. So I needed 5.2 metres of binding tape. All sacks are slightly different so you will need to work out how much binding you need for your sacks.
I used some 50 millimetre wide black cotton binding to bind the edges of the rug (to stop fraying) and give the rug a strong border. Depending upon the size of your sacks you could use a different width binding.
I used a sewing machine to attach the binding – you can hand sew but this will take quite a bit longer.
Instructions – Coffee Bean Sack Rug
Difficulty easy
Makes 1 rug
Making time 60 minutes
Ingredients – Coffee Bean Sack Rug
1 old coffee bean sack
Calculate how much 50 millimetre wide black cotton binding you need (=(2xlength of rug)+(2x width of rug)+0.1 metre)
Pins to hold the binding in place
Black sewing machine thread
Method – Coffee Bean Sack Rug
1. Take out the stitching down the sides of the sack and lay flat. Tidy up the old sack by undoing any seams around the edges and removing loose threads and fraying. You might need to iron your sack to make it lay flat
2. Take your binding and carefully pin it so it that it overlaps the same amount on the front and back of the sack. If the binding is not pinned evenly when the binding is stitched to the sack it will not catch all the binding properly. One way to do this is to fold the binding in half and iron it so it is folded along its length. You can then use this fold as a guide and slot the edge of the sack into the fold
3. When you get to the point you started pinning the binding you will need a small overlap of approximately four centimetres and a small hem. Trim the binding to six centimetres beyond the binding starting point. Fold the end of the binding over with a hem of approximately two centimetres and pin the overlap and hem-end in place
4. Once the binding is pinned and you have checked it is even you can begin sewing with the sewing machine. I used two rows: one at the edge of the binding as close to the edge as possible; and one zig-zag stitch in the middle of the binding. This makes the binding secure and if there is any fraying of the sack it should be caught by the stitching
5. Check the stitching and make sure there are no gaps anywhere. Iron the rug flat if required and enjoy!


