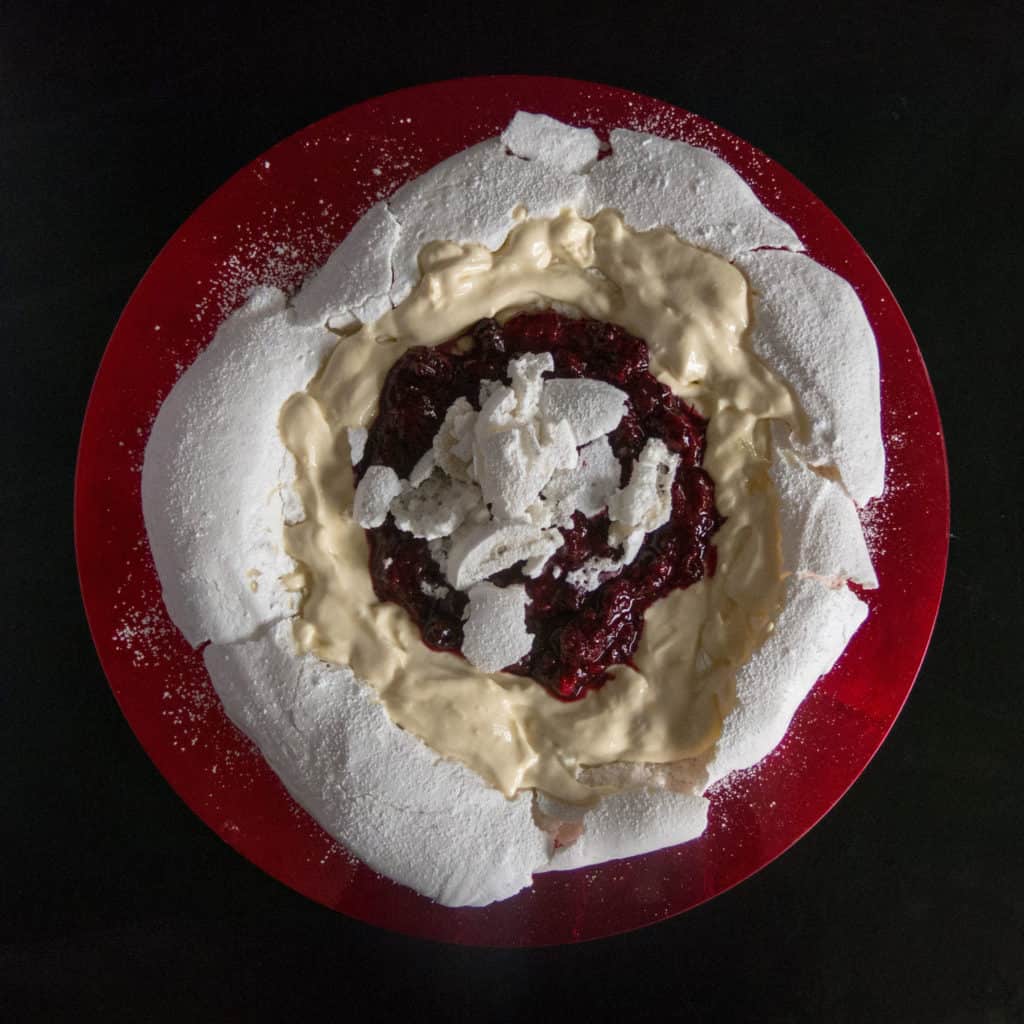
Vegan Meringue is one of those things I would not have thought possible a few years ago. Well now, gluten-free Vegan Meringue is a very real possibility. And very wonderful. I’ll show you how.
Meringue is one of the things I missed as a vegan. Not enough to worry about it but I did quite like meringue when I was a child. There was no replicating it (not even badly) – until the fairly recent discovery of the marvels of chickpea juice. I won’t repeat the mythical discovery stuff here – just plug aquafaba (the fancy name for chickpea juice) into a search engine. Essentially chickpea juice behaves very much like egg whites. As the discovery is pretty recent the science has not been researched but the similarity to egg white more than likely the amount of protein and carbohydrates which leach from the chick peas into the water in the tin. Apparently other tinned bean juice (kidney beans) also produce the same effect but with added colour (yum!).
This recipe is based on a ‘normal’ meringue recipe my Mum used to make. Some recipes add vinegar to the mixture to give a chewy centre but I don’t think this needs it. This can be a little temperamental and you need to take the same steps as with ‘normal meringue’: clean equipment etc. Cold chick pea juice also seems to work better than room temperature. Do not give up whisking, it can take some time to get the thick and glossy, stiff, white peaks.
Allergy Information – Vegan Meringue
Vegan Meringue is gluten-free and vegan as well as… celery free, coconut free, garlic free, lupin free, mustard free, nightshade free, onion free, peanut free, sesame free, soya free, tree nut free.
Top Tips – Vegan Meringue
I prefer chickpeas in water only (no brine or salt added) but you can use either. Chickpea juice is often called aquafaba. You can make your own if you are soaking and boiling chickpea for houmous for example. A much cheaper and more environmentally friendly option.
You can make small nests, large Pavlova cases, or whatever your fancy takes you. This recipe is enough for two 25-30 centimetre Pavlova cases. I made two types here: small chocolate coated and dipped in nuts and a Pavlova with gluten free, vegan cream and forest berries.
When making the ‘meringue’ it is really important to beat it until it is really stiff and then beat it some more and more again. The ‘meringue’ should hold its shape completely and not move at all when the bowl is shaken. This can take quite some time. It is also really important you do not open the door when cooking the ‘meringue’. It will sink and go sticky if you do. If you are going to store the ‘meringue’ you must store it in an air-tight container. However, you should not store it for long at all as it will absorb moisture quickly. I recommend eating the ‘meringue’ pretty quickly after cooking.
It is also important that you do not bake the ‘meringue’ on greaseproof paper. The ‘meringue’ will drop and disintegrate when you take them out of the oven. I don’t know why but they do!
Once the meringue is cooked and cooled store in an airtight box in the fridge. Otherwise the meringues will start to absorb moisture from the atmosphere and go gooey.
Recipe – Vegan Meringue
Difficulty easy
Serves 4-6
Preparation time 10 minutes
Cooking time 120 minutes (excluding cooling time)
Ingredients – Vegan Meringue
Juice from 400 gram tin of chickpeas
0.5 teaspoon cream of tartar
125 grams icing sugar
0.5 teaspoon vanilla extract
Method – Vegan Meringue
1. Preheat the oven to 100 C (fan)
2. In a clean bowl place the chick pea juice and whisk until it doubles in size and becomes foamy (like shaving foam). This should take two to five minutes depending on the power of your whisk
3. Add the cream of tartar and whisk, then add the icing sugar and continue to whisk
4. Keep whisking until the mixture becomes very glossy and stiff and it holds its shape (you can try the trick where you turn the bowl upside down and the mixture stays there)
5. Lay out two large baking sheets
6. You can use a piping bag to create two large or lots of small nests or simply use a spoon to make the shapes you prefer. This recipe is enough to create two Pavlova layers approximately 25 centimetres in diameter
7. Bake in the oven for two hours. Do not open the door. After two hours turn off the oven and leave the nests to cool in the oven for at least an hour. Preferably until completely cool
8. Serve with fresh fruit and vegan cream (or however you want!).

